Stable Diffusion 3 现已登陆 KerasHub!
作者: Hongyu Chiu, fchollet, lukewood, divamgupta
创建日期 2024/10/09
最后修改日期 2024/10/24
描述: 使用 KerasHub 的 Stable Diffusion 3 模型进行图像生成。

概述
Stable Diffusion 3 是一个强大的、开源的潜在扩散模型(LDM),旨在根据文本提示生成高质量的新颖图像。由 Stability AI 发布,它在 10 亿张图像上进行了预训练,并在 3300 万张高质量的审美和偏好图像上进行了微调,与早期版本的 Stable Diffusion 模型相比,性能得到了显著提升。
在本指南中,我们将探讨 KerasHub 对 Stable Diffusion 3 Medium 的实现,包括文本到图像、图像到图像和修复任务。
要开始,让我们安装一些依赖项并获取演示所需的图像。
!pip install -Uq keras
!pip install -Uq git+https://github.com/keras-team/keras-hub.git
!wget -O mountain_dog.png https://raw.githubusercontent.com/keras-team/keras-io/master/guides/img/stable_diffusion_3_in_keras_hub/mountain_dog.png
!wget -O mountain_dog_mask.png https://raw.githubusercontent.com/keras-team/keras-io/master/guides/img/stable_diffusion_3_in_keras_hub/mountain_dog_mask.png
import os

os.environ["KERAS_BACKEND"] = "jax"

import time

import keras
import keras_hub
import matplotlib.pyplot as plt
import numpy as np
from PIL import Image
简介
在深入了解潜在扩散模型的工作原理之前,让我们先使用 KerasHub 的 API 生成一些图像。
为了避免为不同的任务重新初始化变量,我们将使用 KerasHub 的 from_preset 工厂方法来实例化和加载训练好的 backbone 和 preprocessor。如果您只想一次执行一项任务,可以使用更简单的 API,如下所示:
text_to_image = keras_hub.models.StableDiffusion3TextToImage.from_preset(
    "stable_diffusion_3_medium", dtype="float16"
)
这将自动为您加载和配置训练好的 backbone 和 preprocessor。
请注意,在本指南中,我们将使用 image_shape=(512, 512, 3) 来加快图像生成速度。为了获得更高质量的输出,建议使用默认尺寸 1024。由于整个骨干网络大约有 30 亿个参数,这可能难以装入消费级 GPU,因此我们将 dtype="float16" 设置为减少 GPU 内存使用量——官方发布的权重也采用 float16。
同样值得注意的是,预设 "stable_diffusion_3_medium" 排除 T5XXL 文本编码器,因为它需要更多的 GPU 内存。在大多数情况下,性能下降是微不足道的。包括 T5XXL 在内的权重将很快在 KerasHub 上可用。
def display_generated_images(images):
    """Helper function to display the images from the inputs.

    This function accepts the following input formats:
    - 3D numpy array.
    - 4D numpy array: concatenated horizontally.
    - List of 3D numpy arrays: concatenated horizontally.
    """
    display_image = None
    if isinstance(images, np.ndarray):
        if images.ndim == 3:
            display_image = Image.fromarray(images)
        elif images.ndim == 4:
            concated_images = np.concatenate(list(images), axis=1)
            display_image = Image.fromarray(concated_images)
    elif isinstance(images, list):
        concated_images = np.concatenate(images, axis=1)
        display_image = Image.fromarray(concated_images)

    if display_image is None:
        raise ValueError("Unsupported input format.")

    plt.figure(figsize=(10, 10))
    plt.axis("off")
    plt.imshow(display_image)
    plt.show()
    plt.close()


backbone = keras_hub.models.StableDiffusion3Backbone.from_preset(
    "stable_diffusion_3_medium", image_shape=(512, 512, 3), dtype="float16"
)
preprocessor = keras_hub.models.StableDiffusion3TextToImagePreprocessor.from_preset(
    "stable_diffusion_3_medium"
)
text_to_image = keras_hub.models.StableDiffusion3TextToImage(backbone, preprocessor)
接下来,我们给出提示:
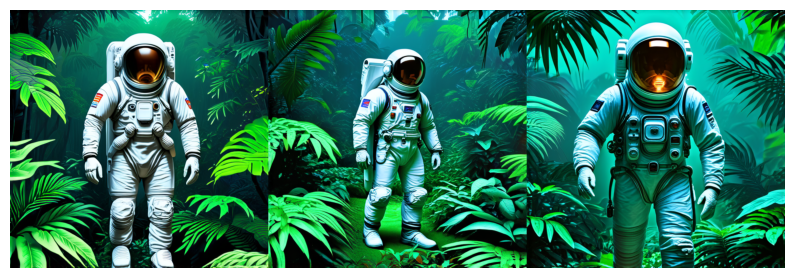
prompt = "Astronaut in a jungle, cold color palette, muted colors, detailed, 8k"

# When using JAX or TensorFlow backends, you might experience a significant
# compilation time during the first `generate()` call. The subsequent
# `generate()` call speedup highlights the power of JIT compilation and caching
# in frameworks like JAX and TensorFlow, making them well-suited for
# high-performance deep learning tasks like image generation.
generated_image = text_to_image.generate(prompt)
display_generated_images(generated_image)

非常棒!但这是如何实现的呢?
让我们深入了解“潜在扩散模型”的含义。
考虑“超分辨率”的概念,其中深度学习模型“降噪”输入图像,将其转换为更高分辨率的版本。模型利用其训练数据分布来推断出最有可能出现的视觉细节。要了解更多关于超分辨率的信息,您可以查阅以下 Keras.io 教程:

当我们把这个想法推向极致时,我们可能会想——如果我们只对纯噪声运行这样的模型呢?然后模型会“降噪”,开始生成一张全新的图像。通过多次重复这个过程,我们可以将一小块噪声变成一张越来越清晰、分辨率越来越高的虚拟图片。
这是 《High-Resolution Image Synthesis with Latent Diffusion Models》 中提出的潜在扩散的关键思想。要深入了解扩散,您可以查阅 Keras.io 教程 《Denoising Diffusion Implicit Models》。

要从潜在扩散过渡到文本到图像系统,必须添加一个关键功能:能够使用提示关键字控制生成的视觉内容。在 Stable Diffusion 3 中,使用 CLIP 和 T5XXL 模型的文本编码器来获取文本嵌入,然后将它们输入到扩散模型以条件化扩散过程。这种方法基于“分类器自由引导”的概念,该概念在 《Classifier-Free Diffusion Guidance》 中提出。
当我们结合这些想法时,我们就可以对 Stable Diffusion 3 的架构有一个高层级的概述。
- 文本编码器:将文本提示转换为文本嵌入。
- 扩散模型:反复“降噪”一个较小的潜在图像块。
- 解码器:将最终的潜在块转换为更高分辨率的图像。
首先,文本提示通过多个文本编码器(预训练且冻结的语言模型)投影到潜在空间。接下来,文本嵌入以及随机生成的噪声块(通常来自高斯分布)被输入到扩散模型中。扩散模型在一系列步骤中反复“降噪”噪声块(步骤越多,图像越清晰、越精细——默认值为 28 步)。最后,潜在块通过 VAE 模型的解码器渲染成高分辨率图像。
Stable Diffusion 3 架构概述:
一旦我们在数十亿张图片及其标题上进行训练,这个相对简单的系统就开始像魔法一样了。正如费曼谈论宇宙时所说:“它并不复杂,只是数量庞大!”
文本到图像任务
现在我们知道了 Stable Diffusion 3 和文本到图像任务的基础。让我们通过 KerasHub API 进一步探索。
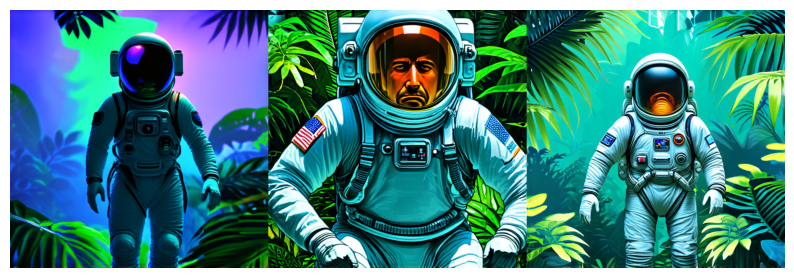
要使用 KerasHub 的 API 进行高效的批量处理,我们可以为模型提供提示列表:
generated_images = text_to_image.generate([prompt] * 3)
display_generated_images(generated_images)
num_steps 参数控制图像生成过程中使用的降噪步数。增加步数通常可以提高图像质量,但会增加生成时间。在 Stable Diffusion 3 中,此参数默认为 28。
num_steps = [10, 28, 50]
generated_images = []
for n in num_steps:
    st = time.time()
    generated_images.append(text_to_image.generate(prompt, num_steps=n))
    print(f"Cost time (`num_steps={n}`): {time.time() - st:.2f}s")

display_generated_images(generated_images)
Cost time (`num_steps=10`): 1.35s

Cost time (`num_steps=28`): 3.44s

Cost time (`num_steps=50`): 6.18s
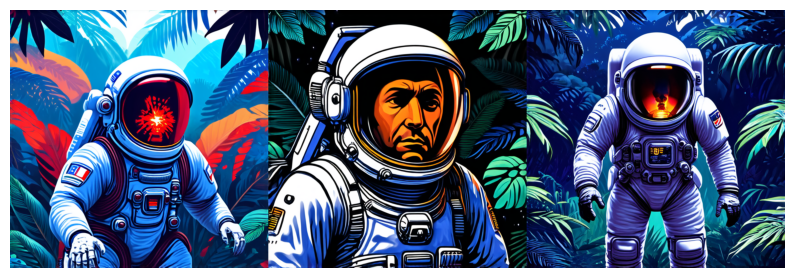
我们可以使用 "negative_prompts" 来引导模型避免生成特定的风格和元素。输入格式变为一个字典,包含 "prompts" 和 "negative_prompts" 键。
如果未提供 "negative_prompts",则将其解释为具有默认值 "" 的无条件提示。
generated_images = text_to_image.generate(
    {
        "prompts": [prompt] * 3,
        "negative_prompts": ["Green color"] * 3,
    }
)
display_generated_images(generated_images)
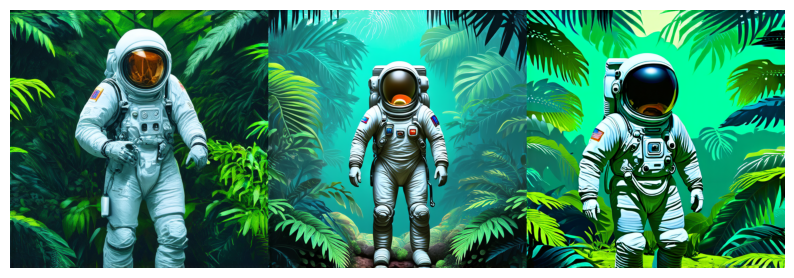
guidance_scale 影响 "prompts" 对图像生成的影响程度。较低的值会让模型更有创意地生成与提示松散相关的图像。较高的值会迫使模型更严格地遵循提示。如果此值过高,您可能会在生成的图像中看到一些伪影。在 Stable Diffusion 3 中,它默认为 7.0。
generated_images = [
    text_to_image.generate(prompt, guidance_scale=2.5),
    text_to_image.generate(prompt, guidance_scale=7.0),
    text_to_image.generate(prompt, guidance_scale=10.5),
]
display_generated_images(generated_images)
请注意,negative_prompts 和 guidance_scale 是相关的。实现中的公式可以表示为:predicted_noise = negative_noise + guidance_scale * (positive_noise - negative_noise)。
图像到图像任务
可以使用参考图像作为扩散过程的起点。这需要在管道中添加一个额外的模块:VAE 模型中的编码器。
参考图像由 VAE 编码器编码到潜在空间,然后在此空间中添加噪声。随后的降噪步骤与文本到图像任务的步骤相同。
输入格式变为一个字典,包含 "images"、"prompts" 和可选的 "negative_prompts" 键。
image_to_image = keras_hub.models.StableDiffusion3ImageToImage(backbone, preprocessor)

image = Image.open("mountain_dog.png").convert("RGB")
image = image.resize((512, 512))
width, height = image.size

# Note that the values of the image must be in the range of [-1.0, 1.0].
rescale = keras.layers.Rescaling(scale=1 / 127.5, offset=-1.0)
image_array = rescale(np.array(image))

prompt = "dog wizard, gandalf, lord of the rings, detailed, fantasy, cute, "
prompt += "adorable, Pixar, Disney, 8k"

generated_image = image_to_image.generate(
    {
        "images": image_array,
        "prompts": prompt,
    }
)
display_generated_images(
    [
        np.array(image),
        generated_image,
    ]
)
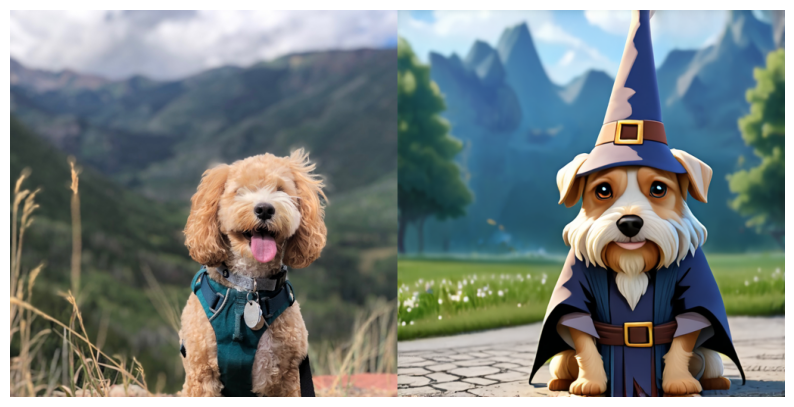
如您所见,一张新图像是根据参考图像和提示生成的。
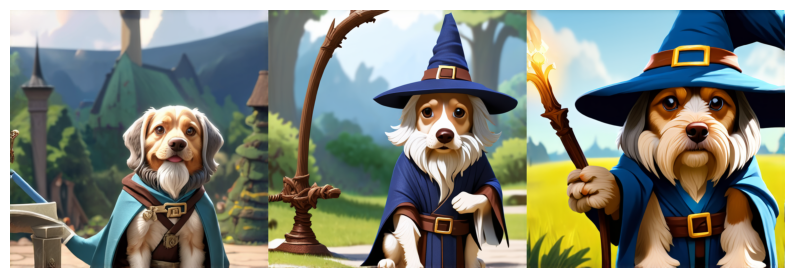
strength 参数在确定生成图像与参考图像的相似程度方面起着关键作用。该值范围为 [0.0, 1.0],在 Stable Diffusion 3 中默认为 0.8。
较高的 strength 值会让模型更有“创造力”,生成与参考图像不同的图像。当值为 1.0 时,将完全忽略参考图像,使任务纯粹成为文本到图像。
较低的 strength 值意味着生成的图像与参考图像更相似。
generated_images = [
    image_to_image.generate(
        {
            "images": image_array,
            "prompts": prompt,
        },
        strength=0.7,
    ),
    image_to_image.generate(
        {
            "images": image_array,
            "prompts": prompt,
        },
        strength=0.8,
    ),
    image_to_image.generate(
        {
            "images": image_array,
            "prompts": prompt,
        },
        strength=0.9,
    ),
]
display_generated_images(generated_images)
修复任务
在图像到图像任务的基础上,我们还可以使用蒙版来控制生成区域。这个过程称为修复,其中图像的特定区域被替换或编辑。
修复依赖于蒙版来确定要修改的图像区域。要修复的区域由白色像素(True)表示,而要保留的区域由黑色像素(False)表示。
对于修复,输入是一个字典,包含 "images"、"masks"、"prompts" 和可选的 "negative_prompts" 键。
inpaint = keras_hub.models.StableDiffusion3Inpaint(backbone, preprocessor)

image = Image.open("mountain_dog.png").convert("RGB")
image = image.resize((512, 512))
image_array = rescale(np.array(image))

# Note that the mask values are of boolean dtype.
mask = Image.open("mountain_dog_mask.png").convert("L")
mask = mask.resize((512, 512))
mask_array = np.array(mask).astype("bool")

prompt = "a black cat with glowing eyes, cute, adorable, disney, pixar, highly "
prompt += "detailed, 8k"

generated_image = inpaint.generate(
    {
        "images": image_array,
        "masks": mask_array,
        "prompts": prompt,
    }
)
display_generated_images(
    [
        np.array(image),
        np.array(mask.convert("RGB")),
        generated_image,
    ]
)
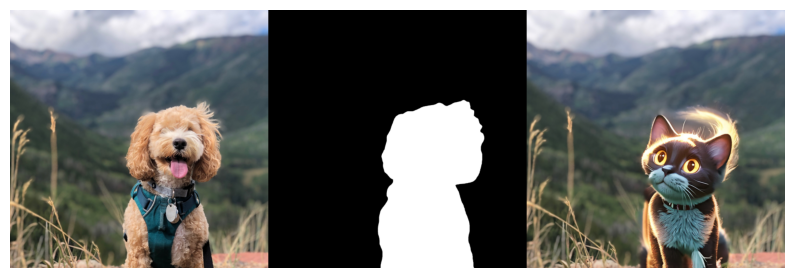
太棒了!狗被一只可爱的黑猫取代了,但与图像到图像不同的是,背景被保留了。
请注意,修复任务也包含 strength 参数来控制图像生成,在 Stable Diffusion 3 中默认为 0.6。
结论
KerasHub 的 StableDiffusion3 支持多种应用,并通过 Keras 3,可以在 TensorFlow、JAX 和 PyTorch 上运行模型!